Ruckus Wireless (Standalone mode)
Purpose
This guide shows how to configure a Ruckus Wireless device in standalone mode, in order to use it in accordance with Volare.
Please note that the images contained in this article may contain outdated configuration data. Therefore, please check the data contained in the article “Parameters for the Solution” at the bottom of the page, as they are certainly up to date.
Prerequisites
This guide applies to the Solution for the version 9.4 or later. If the version is older than 9.4, please upgrade the firmware.
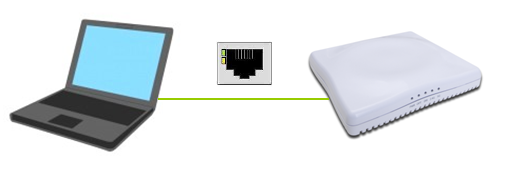
In order to use a Ruckus Wireless device as an access point, it is necessary for the router to be connected to the Internet.
All standalone Ruckus Wireless devices are currently supported.
Accessing the access point
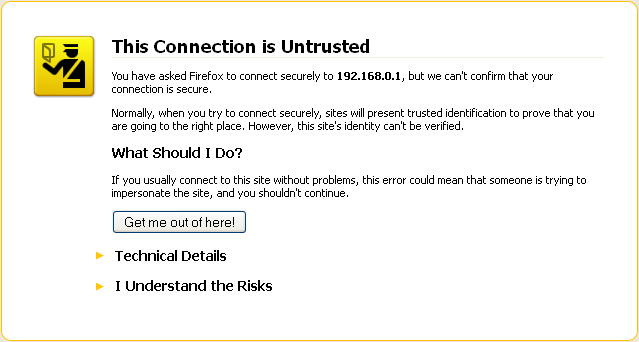
The default IP address of the device is 192.168.0.1.
In order to perform the first access it is recommended to attach your device to a PC having a local IP address in the same network as the AP (for example IP address: 192.168.0.2; netmask 255.255.255.0).
To access the device, type the following URL into your browser: https://192.168.0.1.
A security alert will be displayed. You can securely go ahead.
After, you will be asked for username and password. The default credentials are:
Username: super
Password: sp-admin

Check firmware version
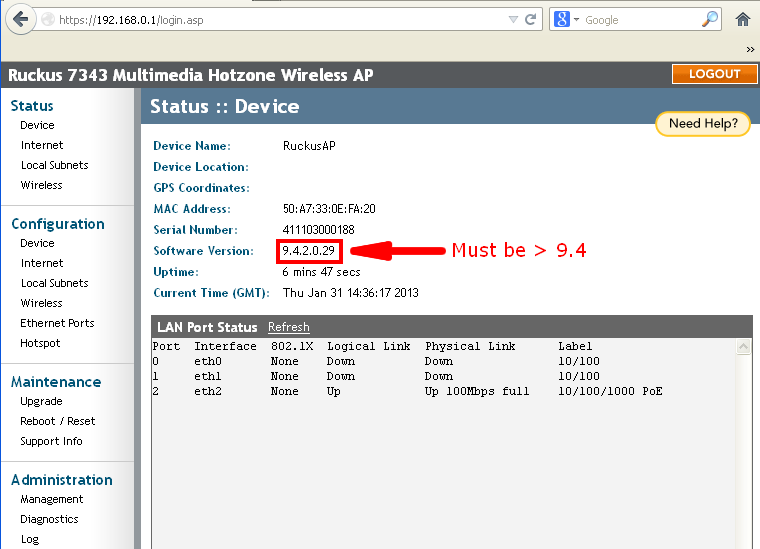
After you’re logged in, you will be redirected to the Status :: Device section. Here you can check the installed software version. If the version is older than 9.4, you must perform a software upgrade, since some of the features shown below are not available for previous versions.
Configuring general settings
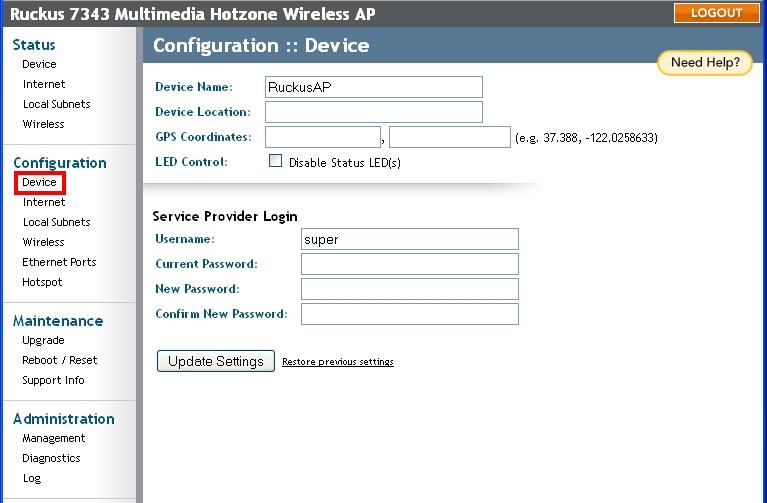
By accessing the Configuration :: Device section is not where to change general settings for the device (for example: the name or the access credentials to access the Web UI). It is necessary to click Update Settings button to save data.
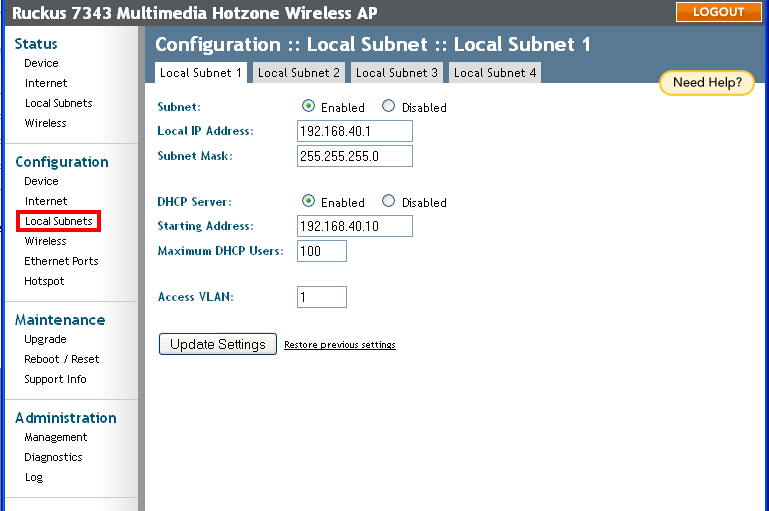
Configuring local subnets
By accessing the Configuration :: Local Subnets section you can set the access point network and the policies for the IP address assignment (such using DHCP server or not, and the IP addresses to assign to clients). It is necessary to click Update Settings button to save data.
Configuring the access point
By accessing the Configuration :: Hotspot section it is possible to set the necessary parameters for the access point configuration (Splash Page URL, the RADIUS Server IP address, data to send to RADIUS server, websites allowed etc.), The two Edit Settings buttons indicated by the arrows are relevant for our process configuration. It is necessary to click Update Settings button to save data.
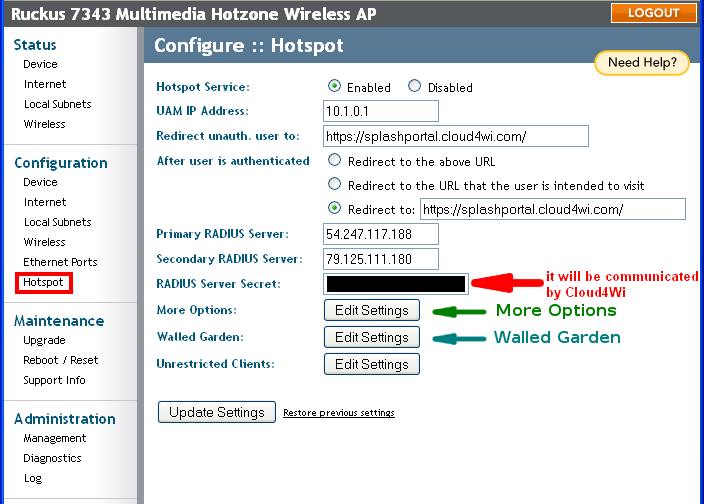
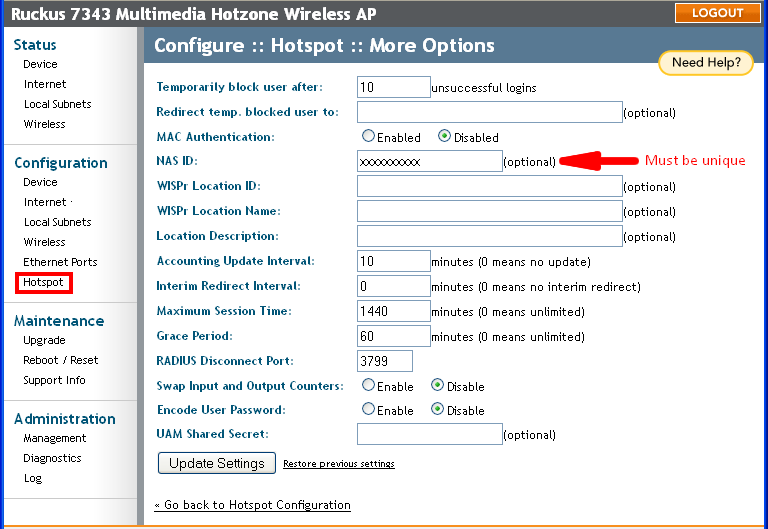
By clicking the Edit Settings button for More Options , you can set particular attributes to send to the RADIUS server. For the proper functioning of the Solution, NAS ID must be not empty and must be unique for all the devices within the network. It is necessary to click Update Settings button to save data.
By clicking the Edit Settings button for Walled Garden , it is possible to set the list of websites allowed also for unauthenticated end-users. You must click the Update button to save data.
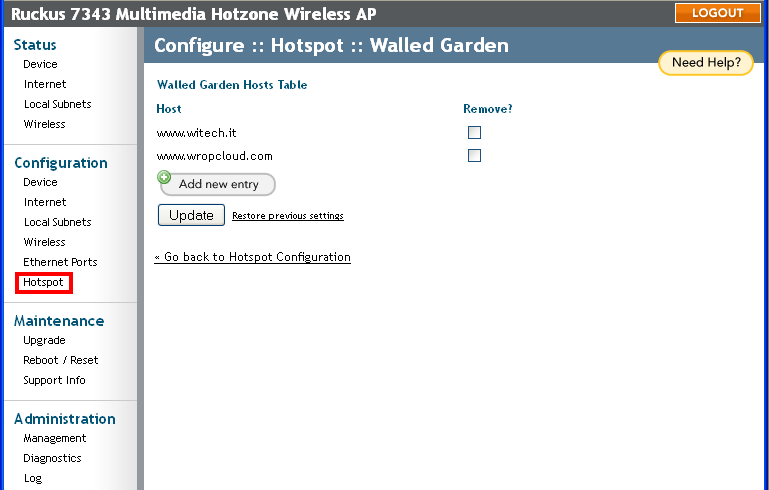
In order to configure the walled garden, please check the following articles:
- Walled garden for the Social Login (websites/domains to open)
- Walled garden for PayPal feature (websites/domains to open)
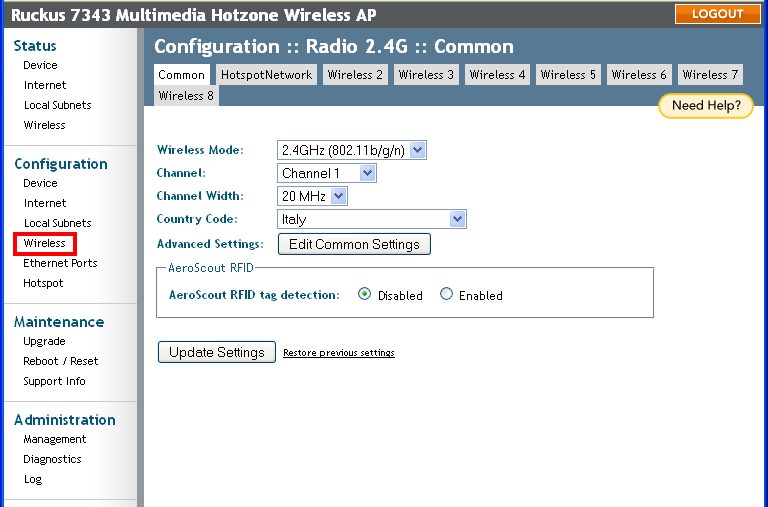
Configuring the wireless network
By accessing the Configuration :: Wireless section, you can configure your wireless networks. On the first tab, it is possible to configure the common settings shared between all the network managed by the device. You must click the Update Settings button to save data.
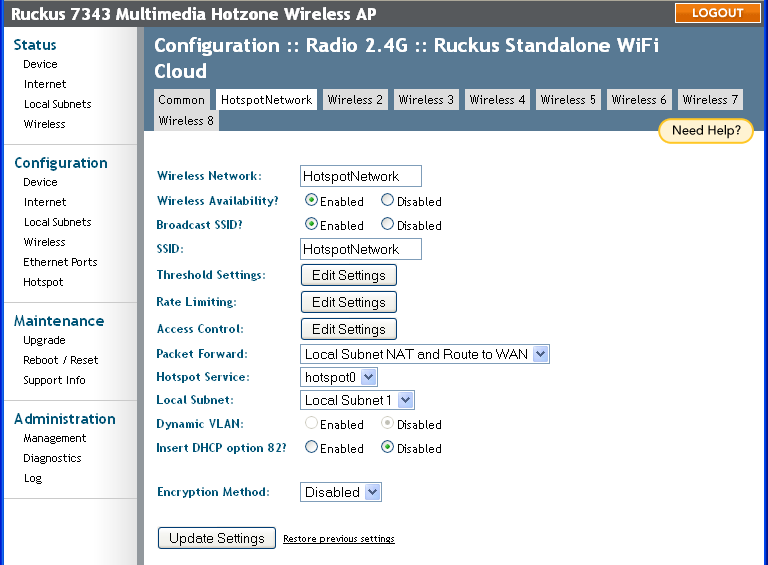
On the other tabs of Configuration :: Wireless section, you can set all the networks to manage (each corresponding to an SSID). The example below shows a network called “HotSpotNetwork”, configured as an access point network and based on the access through Splash Page. The Local Subnet and the Hotspot Service are those configured previously. You must click the Update Settings button to save data.
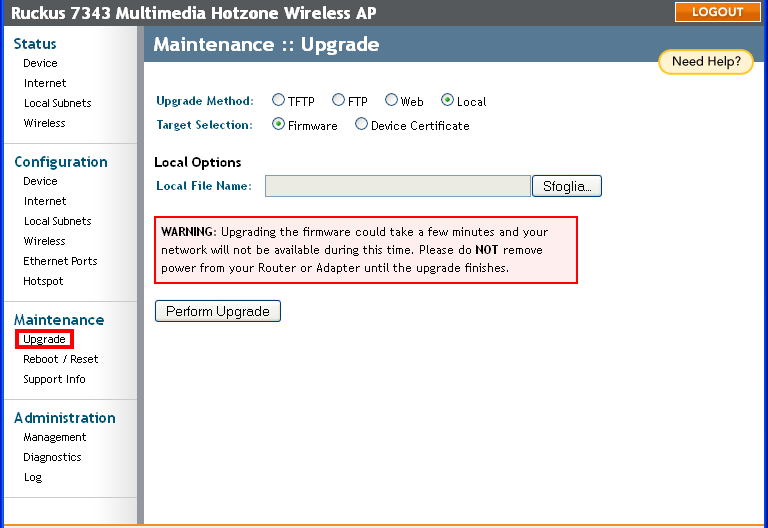
Firmware upgrade
By accessing the Maintenance :: Upgrade section, you can upgrade the device firmware version by using 4 methods (TFTP, FTP, Web, Local).
Allowing free access to the CDN
Explained in the article Enabling the CDN, you must add some IP addresses to the walled garden in order to support the access to the CDN.
The IP addresses to add for this purpose are:
- 50.18.178.180
- 54.248.102.194
- 54.246.86.254
- 46.137.206.166
- 54.232.119.5
- 54.253.118.101
Entering the device details into the Admin Panel
In order to use the device in the Solution, you must enter its details into the Admin Panel.
To get further information on how to do that, please see How to add an access point. Anyway, in the Admin Panel, a field called Identifier will be required by the web interface. For Ruckus Wireless Standalone products, as said before, it corresponds to the NAS ID value that has been configured in Hotspot > More Options settings.
It is mandatory that this value it is unique for all the devices within the network. Otherwise, the devices will be not correctly integrated with the Solution.
Parameters for the Solution
The parameters to use to integrate the device with the Solution are the following:
Configure::Hotspot
Redirect unauth. user to : https://splashportal.cloud4wi.com/
After user is authenticated Redirect to : https://splashportal.cloud4wi.com/
Primary RADIUS Server : 54.247.117.188
Secondary RADIUS Server : 79.125.111.180
RADIUS Server Secret : (it will be communicated by Cloud4Wi)
Please note that it is necessary to enter the Splash Page URL exactly as it is written above.
If you enter the Splash Page URL in different formats (e.g. Cloud4Wi - Splash Portal), then the redirection will fail and the end-user will not be able to see the Splash Page.
If these parameters change in the future, we will promptly inform you about new values.