Configuring and Optimizing your Pepwave MAX Cellular and WiFi Router
Thanks to Turbopilot for his great articles on this site about RV Internet solutions. This discussion is not to repeat those discussions on how or why, please visit those threads, but if you’re reading this it’s because you like me have chosen a Pepwave router for your optimal RV internet solution. I personally highly recommend the Pepwave MAX BR1 MK2 from 5GStore.com which I am NOT affiliated with and these settings should help you get setup. Again, this discussion is about PEPWAVE SETTINGS and not about why or how it got to this, again, search the forums for threads started by “Turbopilot” and you’ll find them.
Disclaimer: These are MY SETTINGS, not the right settings, not the wrong settings, MY settings. They could change tomorrow as I’m constantly tweaking but this should give you exposure to what and where to change things. I WELCOME constructive feedback if anyone suggests something otherwise but this is not intended to be a bits and bytes discussion. The pepwave out of the box is already setup perfectly, some of these may help (or hinder) your Internet experience. Please do not PM me, please reply to this thread so others can learn from your questions or suggestions out in the open so we can all help each other.
Please pay attention to the toolbar on the top and left side menu selections so you know where we are within the settings if I don’t outline it in the discussion.
Cellular Settings:
Assuming your SIM card is installed and active you can click the Details button on the right side of the Cellular SIM row to go into the details. In this area you can see all sorts of cosmic numbers.
 This image has been resized. Click this bar to view the full image. The original image is sized %1%2.

#1 - You can name the connection if you want as I only have one SIM in this unit (I use two pepwaves in my setup) so I am locked to SIM B in this unit as its the only SIM loaded and it’s AT&T so I named it as such in the WAN Connection slot.
#2 - DNS servers, I like to use Google’s DNS servers so I configured the cellular connection to use 8.8.8.8 and 8.8.4.4 as shown.
This image has been resized. Click this bar to view the full image. The original image is sized %1%2.

#1 - I really don’t want to accept 3G connections. Give me LTE or give me nothing. I “believe” by setting this I’m telling the tower I will only accept your LTE connections and not allow you to give me a 3G connection. Even with this setting I have seen 3G fallback which is interesting, probably good, but this has helped me establish good LTE/LTE-A connectivity 99% of the time.
#2 - As I only have one SIM I will typically leave this far left or at the 1 bar threshold. If I had two sims in the unit I recommend as shown, 1 bar, your call
#3 - This one I flip flop on as an experiment. Typically I would suggest for faster failover leaving it to the left remain connected option but at times I want to disconnect from the tower and re-establish a connection and hope for something better. If you’re using daily reboots (setup in the /support.cgi secret area) then you really shouldn’t need this but I do not typically use daily reboots, I don’t think it benefits anything. My $.02. For most of you leave this on the left option to remain connected which is the default, just understand my setting as shown breaks me from the connection when in standby (not priority 1) which I may trigger manually to refresh my connection and get a new lease from the tower, maybe.
#4 - I use either SmartCheck or DNS Lookup but notice I set some settings a little longer on timeouts than the default. I don’t want a lot of failover activity, it’s “expensive” in that a network switch can take about 1-2 minutes and screw up what you’re doing. I’d rather it check/test a few more cycles before dropping my connection and switching to another option if available. I’ve also experimented with disabling this such as in my case where I have only one SIM but if I’m using Cellular + WiFi then you need health checking enabled for failover between those connections.
Network Settings (Network on top menu / Network settings on left)
This image has been resized. Click this bar to view the full image. The original image is sized %1%2.
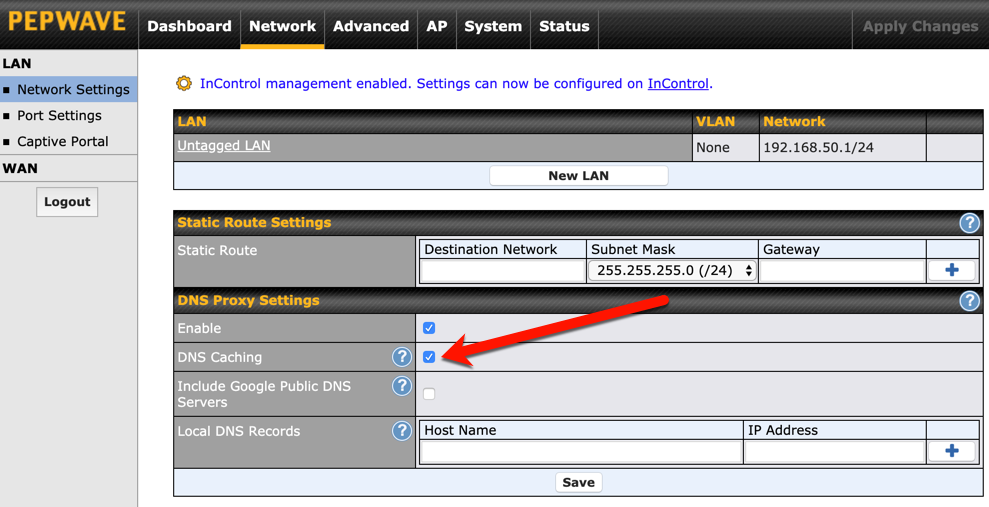
I recommend enabling DNS caching and you can also check the box below to add google public DNS but as I manually use them with 8.8.8.8 and 8.8.4.4 I really don’t get a benefit here. I may actually check this option again, can’t hurt.
Configuring your WiFi Network Name and Password: (AP top menu)
This image has been resized. Click this bar to view the full image. The original image is sized %1%2.
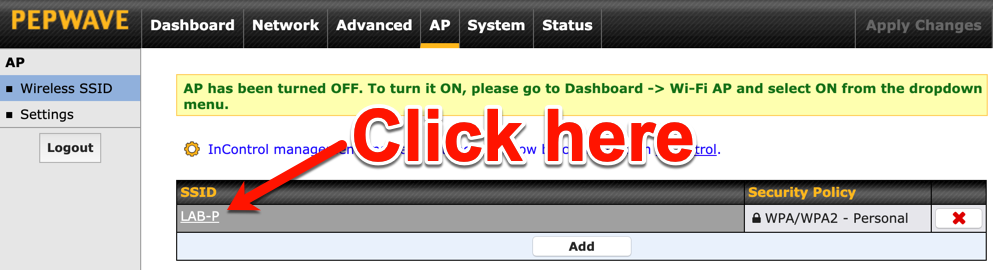
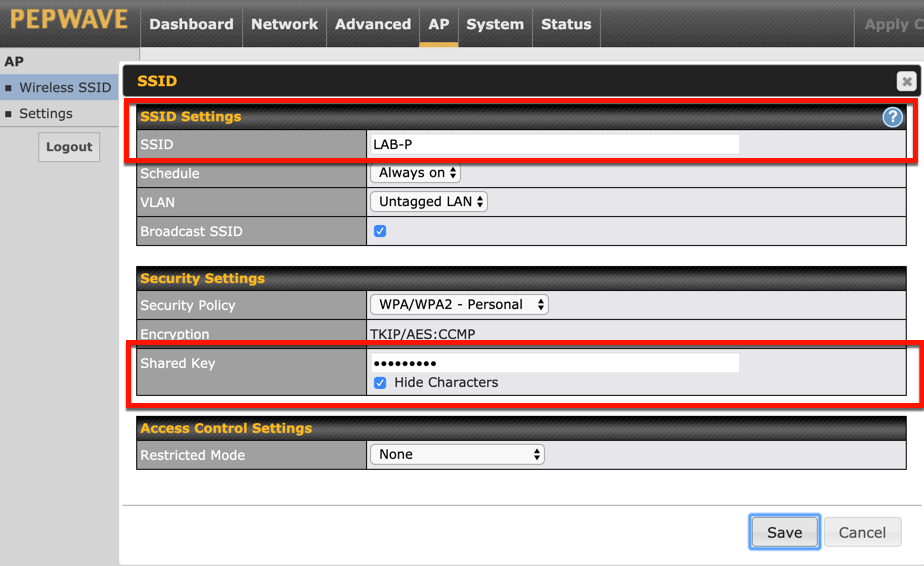
AP stands for Access Point which is your WiFi network you’ll connect your phones, tables, devices to if desired. You can rename your SSID to show your desired name in the WiFi list by clicking the hyperlink the arrow is pointing to. In the next screen you can set the name and password (shared secret).
This image has been resized. Click this bar to view the full image. The original image is sized %1%2.
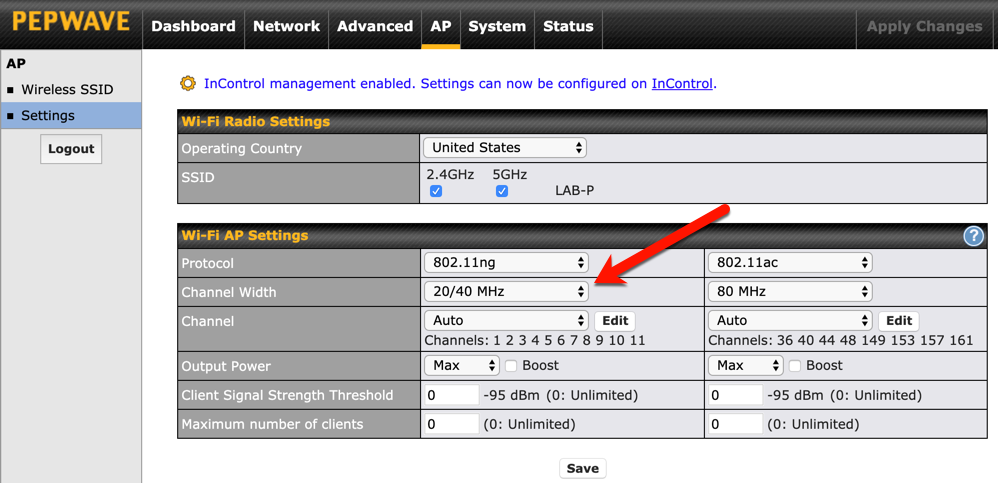
In the screen below I made one change to the 802.11ng Channel Width (Click Settings on the left side bar).
This image has been resized. Click this bar to view the full image. The original image is sized %1%2.
System Area:
This image has been resized. Click this bar to view the full image. The original image is sized %1%2.
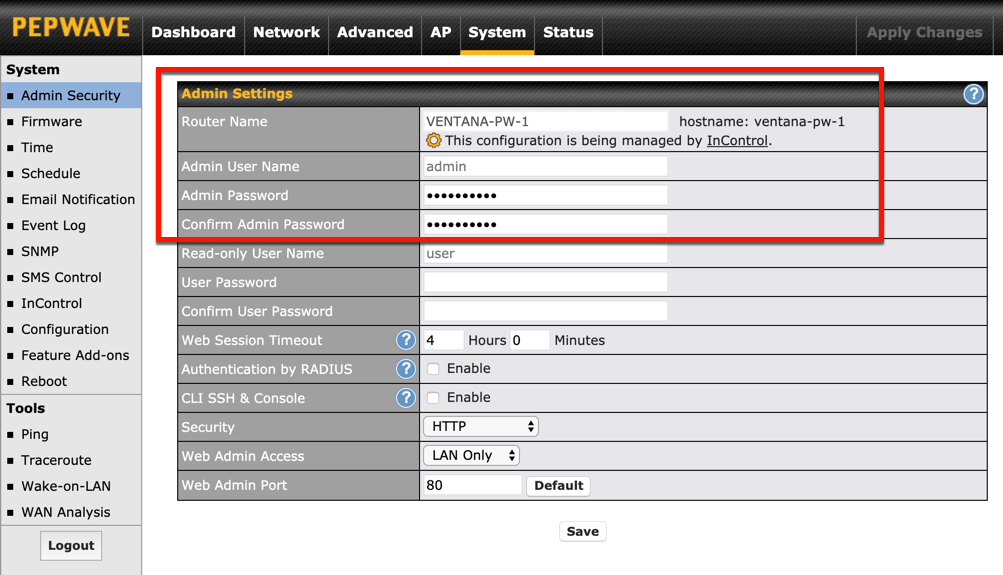
If you want to use InControl, Pepwave’s cloud system (really designed for fleet management and geeks that want to see neat stuff) you can name your unit in the System > Admin Security area. In this area you can set the password for your access to the Admin CP which is typically at 192.168.50.1 per the setup guide.
This image has been resized. Click this bar to view the full image. The original image is sized %1%2.
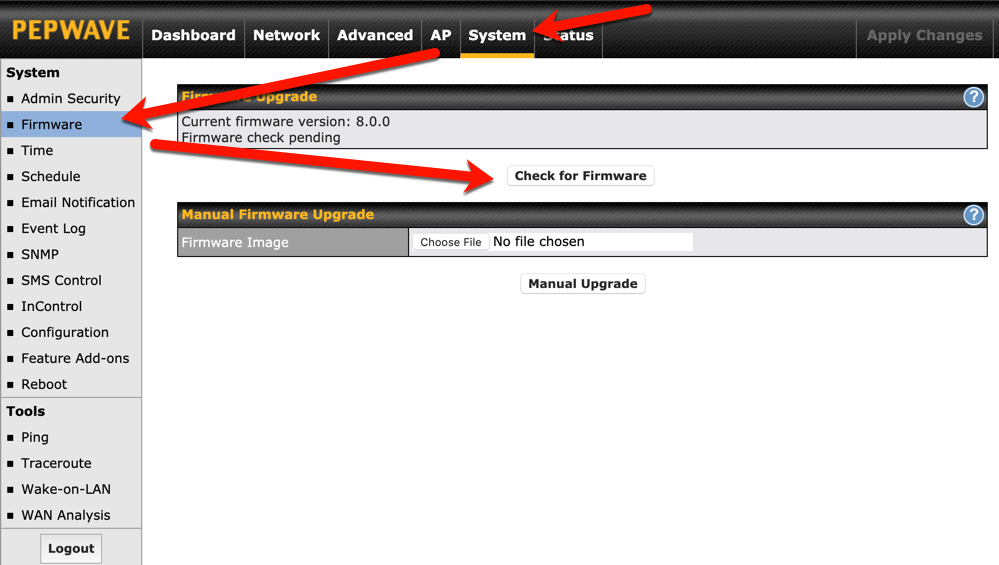
Once you have an Internet connection either via Cellular or WiFi you can check for firmware updates, likely you will have one. Be patient and let it complete the update as it takes 5-10 minutes.
Saving your Configuration:
This image has been resized. Click this bar to view the full image. The original image is sized %1%2.
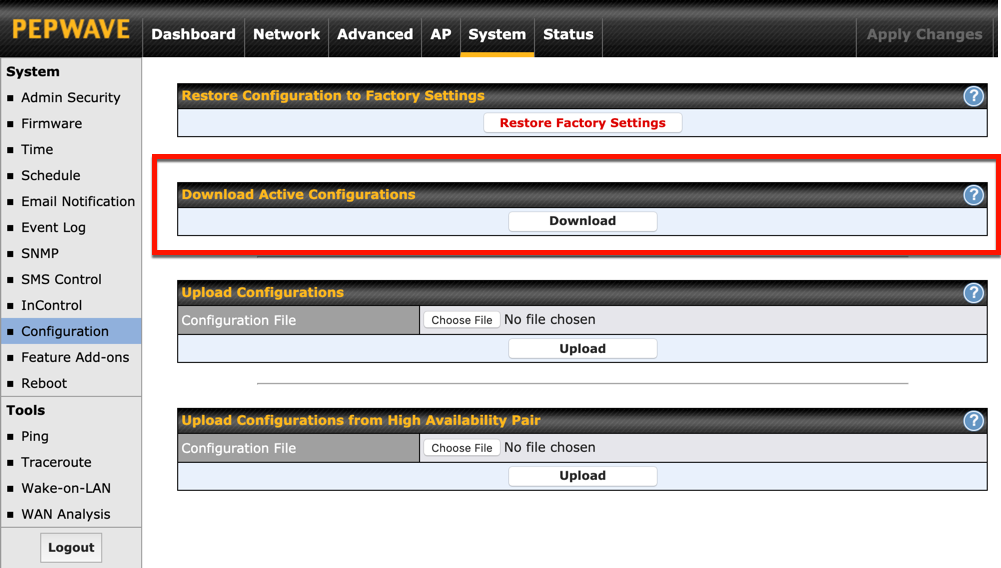
Once you’re all setup and from time to time after tweaking you can download your configuration to a file that you could use to restore later should you need to factory reset your unit. Just click the download button and save the file in your favorite backup area. I personally use Dropbox and use a Dropbox/Backup/Pepwave folder.
Saving:
In some popup screens you’ll have a Save & Apply button. In some areas they won’t save until you click APPLY CHANGES on the top right toolbar area. Pay attention to actually save/commit your changes.