QNAP’s VioStor network video recorder (NVR) series is among the first video management software (VMS) platforms to support the VIVOTEK FE8172/72V 5-Megapixel and FE8171V 3-Megapixel fisheye fixed dome network camera. The VioStor NVR allows users to digitally zoom into areas of a hemispheric image in both live or playback view. Users can also view a complete scene unfold without obstruction while simultaneously displaying multiple independent dewarped views from a VIVOTEK FE8172/72V/71V camera.
This article will guide you to configure the VioStor NVR to record the videos from the VIVOTEK FE8172/72V/71V network camera and dewarp the fisheye images for live monitoring.
For the information of the VIVOTEK FE8172/72V/71V camera, please visit: http://www.vivotek.com/web/product/productdetail.aspx?model=fe8172&newlang=fr
Prerequisites:
- The firmware version of the VioStor NVR must be 4.0 or above. Download the latest firmware from here.
- The VIVOTEK FE8172/72V/71V camera must be mounted in a proper position and connected to a POE switch.
A. Set up the VioStor NVR
Follow the steps below to configure the VioStor NVR.
- Run the “QNAP Finder” on a Windows PC to find the NVR. Double click the NVR name to connect to the login page by a web browser.
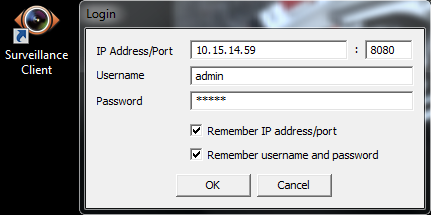
Mac users can connect to the NVR by the “Surveillance Client for Mac” utility. - Login the NVR as “admin”.
- On the live view window, click
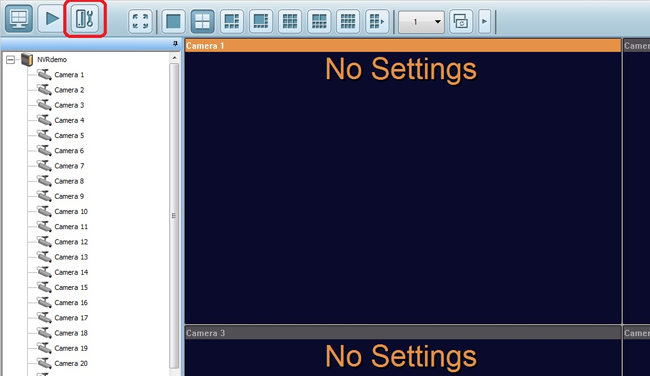 (System Configuration).
- The “Camera Configuration” page will be shown. Select a channel for the camera and click
 (Settings).
- Use auto search to find the VIVOTEK FE8172 camera and click “Add”.
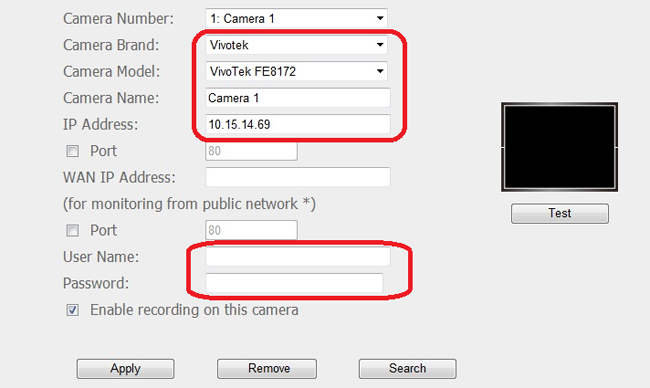
Or manually select the camera brand and model. Enter the IP address, username and password of the camera. Click “Apply”.
- Go to “Camera Settings” > “Recording Settings”. Select the camera channel and specify the recording settings. Click “Apply”.

- Now return to the live view window of the VioStor NVR. You can view the live image of the VIVOTEK camera. Fisheye view without dewarping.
B. Configure the live view settings
Right click the camera channel and select “Properties” on the live view window.
Select “Fixed resolution” under “Video Resolution”.
Note: Select “Stream from server” for more stable performance of viewing while more processing power of the NVR will be consumed.
C. Dewarp fisheye images of the VIVOTEK camera in live view
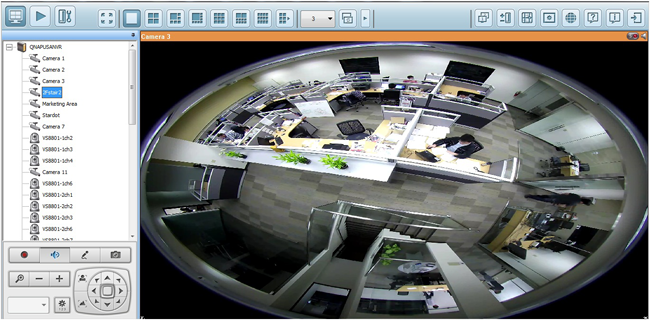
Shown below is the original Fisheye image without processing by the VioStor NVR.
With the digital zoom function enabled, the NVR users can digitally zoom into areas of a hemispheric image.
- To dewarp the fisheye images of the VIVOTEK camera, right click the image and select “Dewarp fisheye images” > “Enable”.
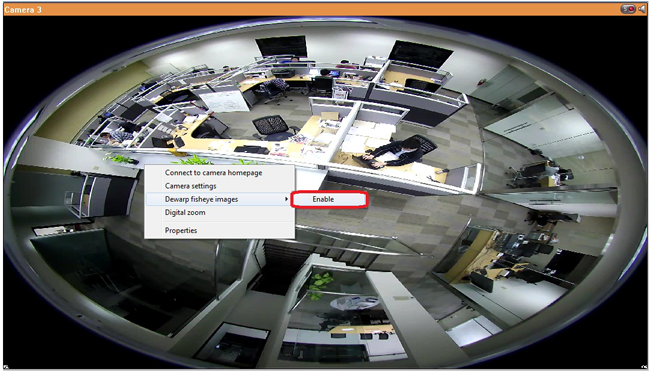
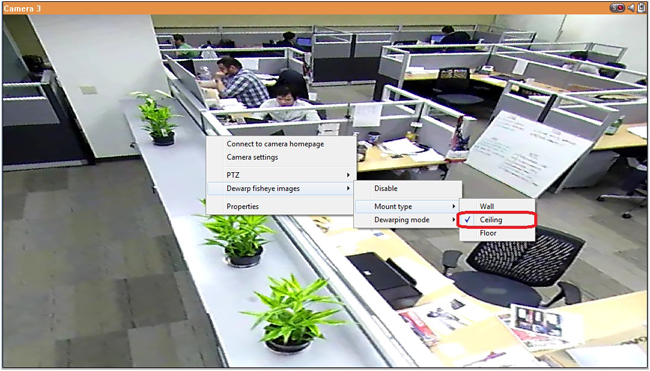
- The “Mount type” and “Dewarping mode” options will appear.
- Select " Ceiling " for the mount type.
The combinations are shown as below:
Example 1
- Mount type: Ceiling
- Dewarping mode: Panorama (Full View)
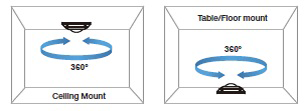
Note: For Ceiling and Floor Mount type, FullView will display 360 degrees of viewing angle.
Example 2
- Mount type: Ceiling
- Dewarping mode: Rectangle with PTZ options
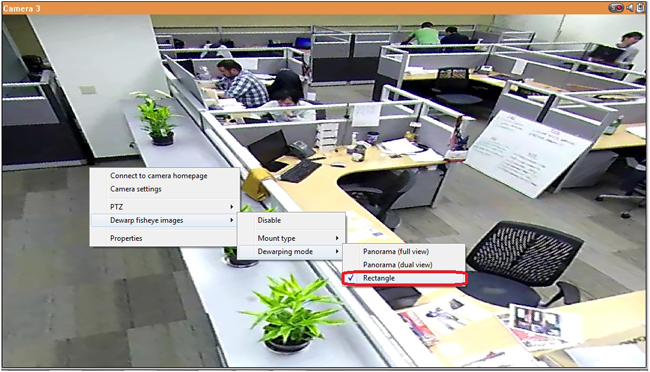
Example 3
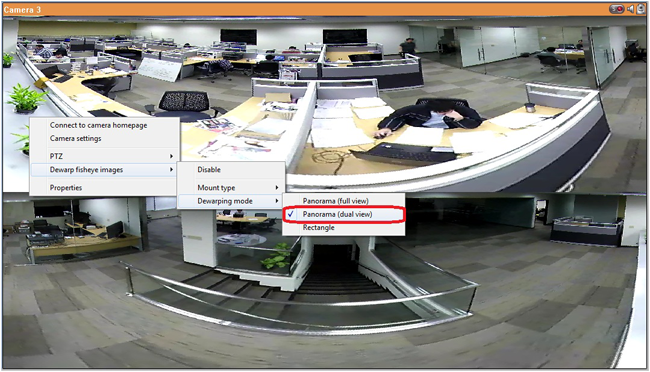
- Mount type: Ceiling
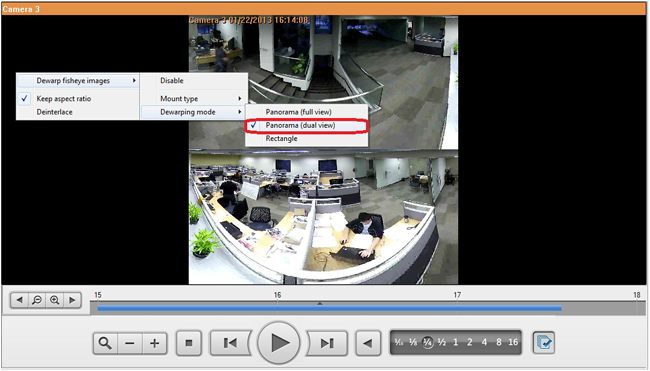
- Dewarping mode: Panorama (Dual View)
Example 4
- Mount type: Floor
- Dewarping mode: Rectangle with PTZ
D. Dewarp fisheye images of the VIVOTEK camera in playback
Click ![]() to enter the playback mode.
to enter the playback mode.
With the digital zoom function enabled, the NVR users can digitally zoom into areas of a hemispheric image.
Right click the image and enable the option “Dewarp fisheye images”.
Select the mount type: Wall, Ceiling, or Floor according to your setup environment.
You may also specify the dewarping mode.
Example:
Rectangle
Panorama (Full View)
Panoramic (Dual View)
Curated by Liquid Layer Networks
At LiquidLayer.net, we’ve made a shared web hosting platform that’s both feature-rich and easy to make use of. Our programmers have built up a custom Linux cloud web hosting platform plus an innovative Control Panel that perfectly takes advantage of its capabilities. After long hours of programming and bug fixing on our end, we are now capable to guarantee that all of our shared web hosting services are safe, virus-free, full of capabilities and very easy-to-work-with. In addition, they feature 99.9% server uptime as well as 99.9% network uptime warranties.
Powered by:

HostCheetah Networks
Global Web Hosting, Domain Registration and Internet Services
https://hostcheetah.net | http://hostcheetah.uk